Showing posts with label flowers. Show all posts

Wednesday, January 30, 2013

Fun Fabric Flowers


It's very hard to believe,but I started making these fabric flowers almost 33 years ago for my own wedding.  I actually used the same fabric for the flowers that was used for the bridesmaid dresses.  I made a handful of flowers for each table at the reception, and I loved the way they turned out.  Over the years, it seems that weddings had become more "glam", but now a days, each wedding seems to really reflect the aesthetics of the bride and groom.  There are so many choices, from a very formal, evening gown, crystal and chandelier event to an afternoon, informal, "picnic-like wedding."  And, everything in between!   If I were getting married now, I would have a terrible time making a choice!

My nephew is to be married this spring to a wonderful young lady that we all dearly love!  She is sweet, funny, an amazing musician, and best of all, very creative and crafty!  My nephew is very crafty, too, so they have decided to add lots of wonderful, personal touches to their wedding.  Using these fabric flowers as a part of their reception table center pieces, is just one of them!

Since we have a small group of loving relatives to assist in making these flowers, I thought I would prepare a tutorial for them and for the blogging world as well.  Sorry for the zillion pictures, but I truly believe that a pictures is worth a thousand words!


Supplies for making these fabric flowers:
white (fabric/paper?) covered wire
wire cutters
fabric (flowers and leaves)
white crafters glue ( I used Elmer's) 
small sharp scissors
floral tape
long heavier wire for stems (I prefer the covered wire)

Directions:  First you need to decide what type of flower you want to make to determine the shape of each petal.  I chose a round petaled flower, to be used as a focus in the centerpieces.  I also decided to make three different size petals for each flower.  So, as I describe how to make these flowers, please understand that I am only describing how to make these specific flowers. In actuality, the flower type, size, and number of petals per flower are almost limitless!


Making the petal forms:  I decided to make three different size petals, 6 of each size for each flower.  I made an sample petal wire for each size, to make sure that all of the petals and flowers are somewhat uniform.  To protect your scissors, you might want to use a wire cutter to cut the wire.
Since the wire will show on the flowers, I used a cloth/paper (I can't really tell what the wire is covered with) covered white wire. It comes on a spool and is very soft and easy to work with.  I would prefer a sturdier wire, so that the petals wouldn't bend so easily, but the white appears to only come in this strength.  Cut the wire as follows:
(6)  approximately 9" long
(6) approximately  7.5" long
(6) approximately  6" long
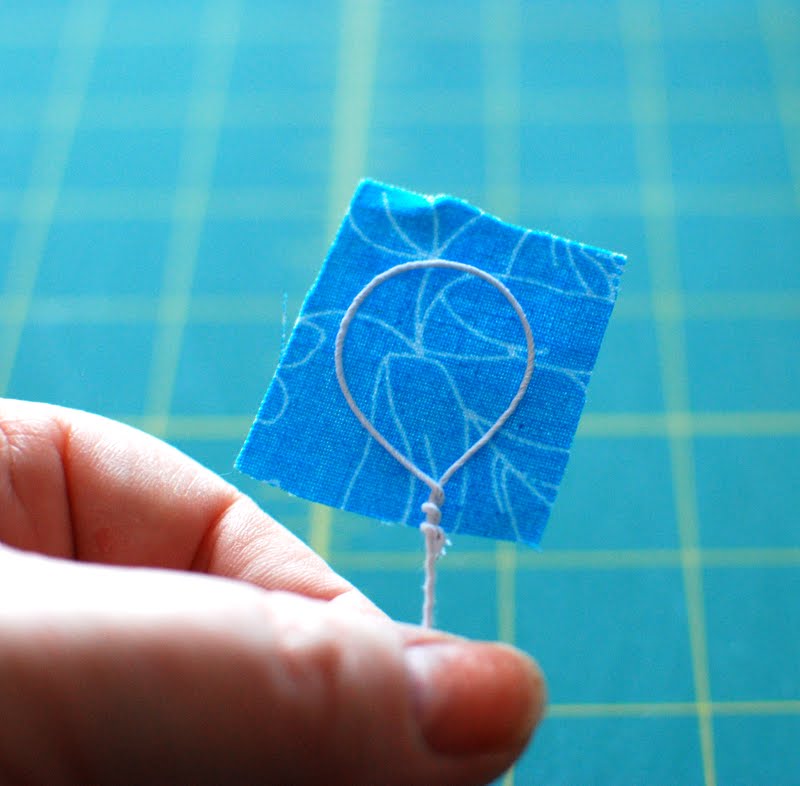
Make each petal by forming a loop and twisting the end.  The large loop is approximately 
2  1/2" X 1  3/4",  the medium sized loop is approximately 1  3/4" X 1  1/2", and the small loop is approximately  1 1/2" X 1".  Compare these loops to your sample petal loops to make sure that they are the same size and shape.  Adjust as needed.  Make 6 of each size.


The petal can be shaped at this point.  (no bends, no kinks, etc)

 Keep the different sized petals separate, as they will be added to the flower according to their size.
 Fabric- I like to use cotton, or cotton polyester fabric, but am sure that other types of fabrics would work.  It is VERY important that the fabric is ironed and that there are no creases.  Creases or folds will definitely show in the completed flower.  Lay a petal on the fabric to determine the size of fabric piece you will need for each flower.  Give yourself a bit of room around the wire to make sure that the wire will fit.  Cut the fabric pieces.  Cut enough fabric pieces for all 18 petals.  Any type print, stripe, check, plaid, polka dot, etc., fabric will work and make for fun and interesting flowers.
 Cut 6 pieces of each size fabric
Adhering the fabric to the wire: 
I use a small paint brush and Elmer's Glue (not diluted) to paint glue onto each wire (one side only).  Use the glue liberally, but not to the point where it's dripping or has lumps of glue.
 When the wire has been "painted" with glue, press a fabric piece onto the wire.  You should be able to do this without getting glue on your fingers, or only a smidgen on your fingers.
Let the glue dry.  I have found that the petals don't lay flat very well after gluing, so I lay them on raised surfaces with the stem pointing out so the the petal portion of the wire has a better attachment to the fabric.  In other words, on the edge of a book, box, counter, etc.
Cutting the petals:  This is the part that is a bit time consuming and where a pair of small sharp scissors comes in handy.  Carefully cut around each petal wire, as close to the wire as you can get without cutting the wire.  If you accidentally cut the wire, toss the petal out, it just won't hold it's shape.  You want a clean edge on the petal. When cutting the fabric, you may notice that a portion of fabric is not glued to the wire; just use your small brush and dab a small amount of glue to the wire and re-attach the fabric.  Let it dry before you continue to cut.
 Cut all the way around each petal.
 When you are finished cutting, you should have six large, six medium, and six small petals.  You are now ready to assemble the petals to create a flower.
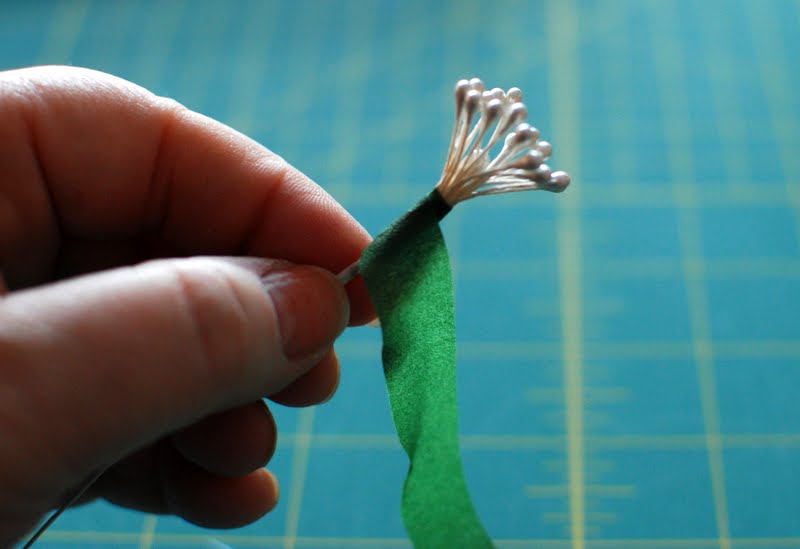
 You can purchase pre-made flower centers, or make our own.  This is a pre-made center.  Just spread/ fan the anthers apart.
 Cut a medium length of floral tape.
Tightly wrap the flower center in floral tape.l
 Add one small petal at a time wrapping tightly with the floral tape after each petal.  The white wire on the petal should face the flower center.  Add three petals.
Now, add the remaining three small petals (one at a time) so that each one is spaced between the other small petals.  The floral tape should be wrapped tightly so that it adheres to itself.
 Now add three medium sized petals, one at a time wrapping the floral tape tightly.  The white wire on the petals should be facing the small petals.  These medium sized petals should be spaced around the small petals
 Add the remaining medium sized petals in the spaces between the previous medium sized petals.  The petals should be added one at a time, wrapping tightly with the floral tape.  If you run out of floral tape, just cut another piece and wrap the core one time before adding new petals.  All the petals will be pointing up. at this point.
 As you add the large petals, the flower will feel a little crowded.  I tend to bend the petal back a bit as I add the large petals to leave more room for the petals and make the tape wrapping easier. 
 Add three large petals to the flower core, one at a time, spacing them out and wrapping each one to the core with the floral tape.
 Add the last three petals to the flower, making sure that the petals are spaced evenly.
 At this point, the petals are all added, but there is no stem.  To save money, I keep the petal stems short, adding a heavier stem wire to the completed flower.
 
 Hold a heavier stem wire next to the petal stems and wrap the entire length tightly with floral tape.
 Voila!
 Shaping the flower:  Bend all of the petals away from the center, one petal at a time.  Be gentle, the wire is soft and bends and kinks easily!
 Start with the large petals.
Then bend the medium petals away from the center.
 Finally bend the small petals away from the center. If you are making a flower, such as a Black Eyed Susan or a Purple Cone Flower, you are finished.
 But, I wanted a flower such as Lotus.  So, I bent each tip back toward the center, as shown above.  On the left:  Purple Cone Flower shape.  On the right: Lotus flower shape.
 Ta Da!  A pretty blue fabric flower.
 How about a yellow and white striped flower?

 Hot pink anyone?
 Variegated Orange?
Different fabrics, flower types, sizes......the possibilities are endless.  Have fun creating your own fabric flower garden or floral arrangement!


Have a great week!

Wednesday, July 11, 2012

Beautiful Day Lilies

Summer is here and with it comes those hot, humid days when a cool breeze makes all the difference.  Summer is a time for hot dogs at the ball park, juicy tomatoes off of the vine, swimming, and for me...a time for flowers.  I love a beautiful flower garden and hope someday to have the type of garden with a slate foot path through  scads and scads of flowers!  Not too long ago, my cousin bought a fairly new, beautiful house.  Another cousin, who has an absolutely beautiful yard, was asked to plan the landscaping, as the previous owners didn't quite get around to doing it.  I was roaming the yard with her and another cousin and she was throwing out ideas for plantings.  I suggested Day Lilies in a certain area and she said no,  and I think she called them "junk" flowers.  She had some in her yard and had a tough time getting rid of them.  I was really surprised, as I really love Day Lilies.  But, everyone has their own tastes, which makes the world so much more interesting.  I thought I would share some of our Day Lilies with you, and maybe you will understand why I love them!

We have a few different varieties, but all have similar leaves and of course the blooms only last one day.


There is a farm not too far from us, where they develop different varieties of Day Lilies. A couple of years ago, my husband and kids and I each picked out a Day Lily to bring home that we call our own.  My son and daughter can remember the names of their lilies; I don't remember the name of mine...typical!  I should just make up a new one!


This is the "double, frilly," Day Lily that my husband chose. And, no, he doesn't remember the name either.  It is so pretty!


The is my Day Lily, it is more off white than yellow.  The "Day Lily" experts have been trying to develop a white Day Lily, and I though this was pretty close!


This is a pretty common variety of Day Lily.

This is my daughter's Day Lily.  It's called Music Melody...yes, she remembered the name!  I think this one is particularly pretty, so delicate!


This is my son's Day Lily...Vibrant!  And yes, he remembers its' name..Scarlet O'Hara!


I had to show one with a bug inside!


Another one of my favorites!


Yep, Day Lilies are beautiful flowers!

I hope you're enjoying the summer, it is just flying by.  Stay Cool!